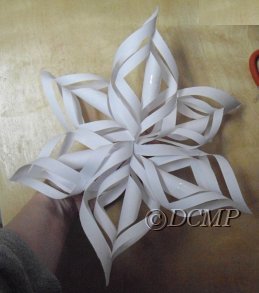
Beautiful 3-D Snowflake |
|---|
Beautiful 3-D Snowflake |
|---|
Step 1:
|
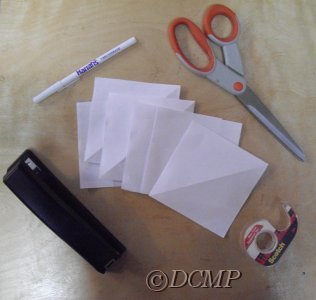
Materials Needed: * Six (6) Square Sheets of Paper
* Scissors * Pencil (optional - for marking lines) |
Step 2:
|
Take sheet of paper |
Step 3:
|
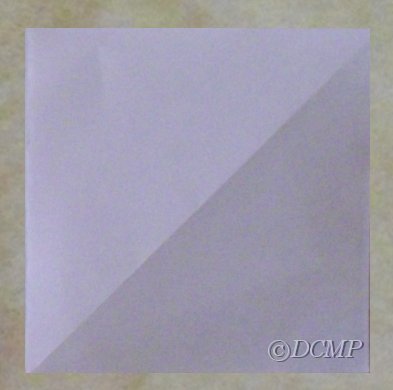
Fold in half, diagnally |
Step 4:
|
You do not need to make the marks, but you may choose to. We made one extra square sheet with the marks, cut it (as will be shown), and used it as a template to cut the sheets used to make the snowflake. These lines are 1 cm in width. Notice that the lines created do NOT meet at the top. You'll see why in the next step. |
Step 5:
|
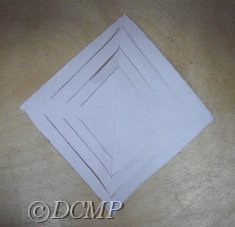
Cut along the lines. Do NOT make cuts that meet! You want to leave some space as can be seen in the picture to the left. |
Step 6:
|
Open your paper. |
Step 7:
|
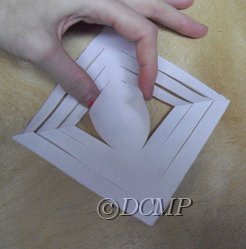
Fold the two sides from the center pieces, and bring together. Allow a small amount of overlap. Tape ends together. See images to left. |
Step 8:
|
Turn paper around to other side (We'll call this "Side B" from here after.) |
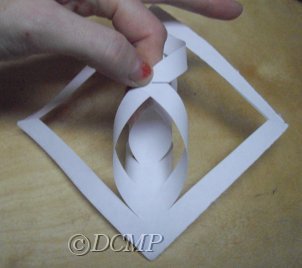
Step 9:
|
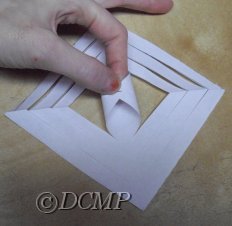
Fold the two sides from the next set of center pieces, and bring together. Allow a small amount of overlap. Tape ends together. See images to left. |
Step 10:
|
Turn paper back over to "Side A." |
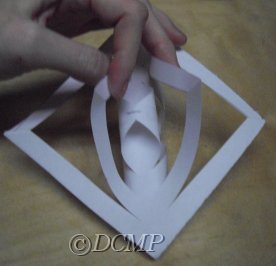
Step 11:
|
Fold the two sides from the next set of center pieces, and bring together. Allow a small amount of overlap. Tape ends together. See images to left. |
Step 12:
|
Turn paper over, back to "Side B." |
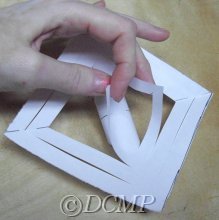
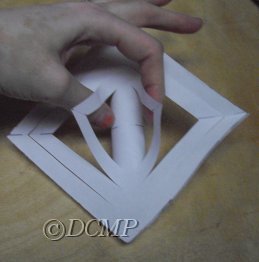
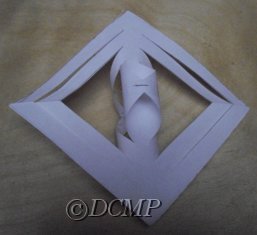
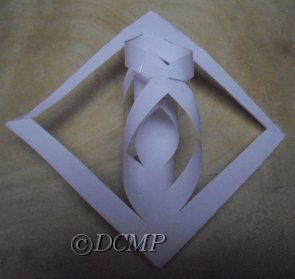
Step 13:
|
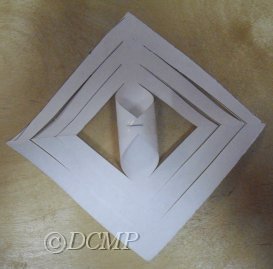
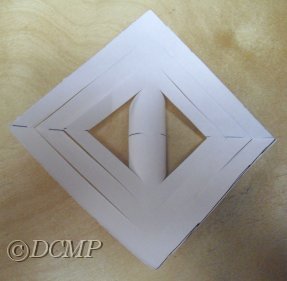
Fold the two sides from the next set of center pieces, and bring together. Allow a small amount of overlap. Tape ends together. See image to left. |
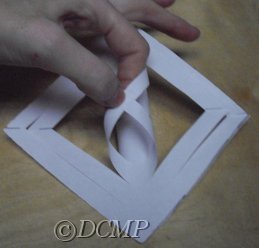
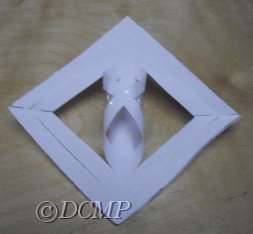
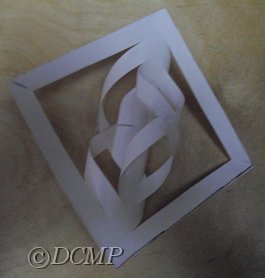
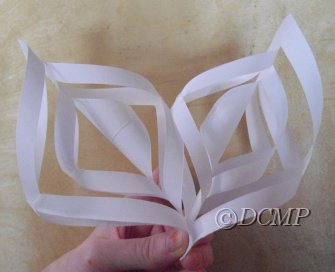
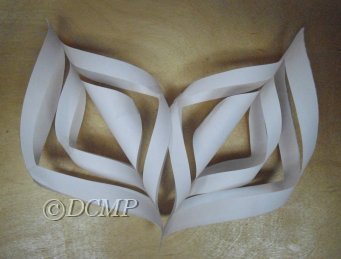
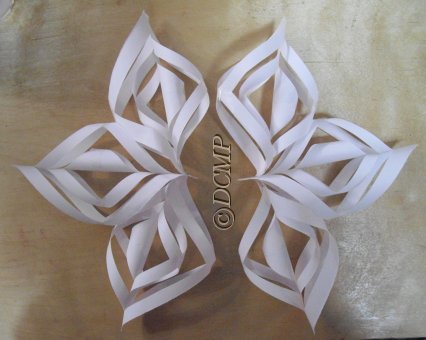
  |
These are pictures of both sides of the first section of the snowflake. As it is, it is very pretty! You can use this as a decoration, as well. Now, onto how this makes your snowflake. |
Step 14:
|
Repeat steps 3 to 13 for the remaining five (5) squares of paper. |
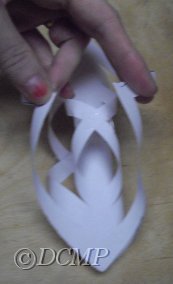
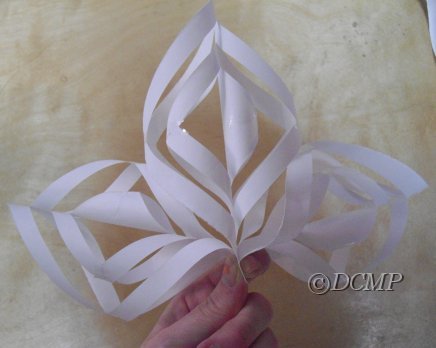
There are two (2) ways to proceed. One is using a stapler, the other with tape (or stick glue). We'll show both.
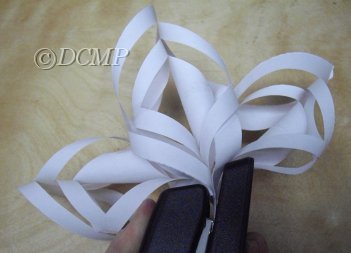
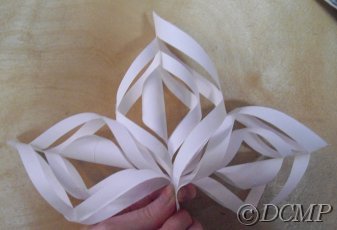
Step 15 - A:
|
Gather three (3) sections and staple together as shown in the images to the left. |
Step 15 - B:
|
Gather two (2) sections and tape together (as shown in the images to the left). Next, take a third section and tape it to the two (2) sections already taped together (as shown in the imags to the left). |
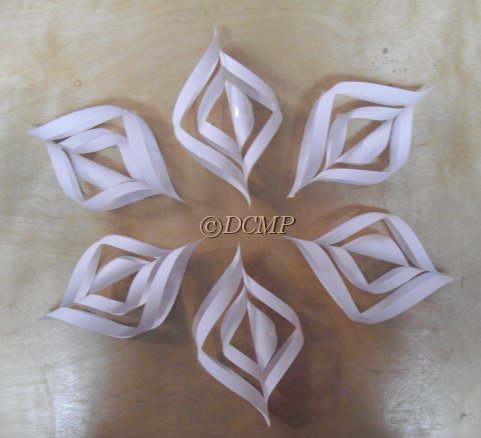
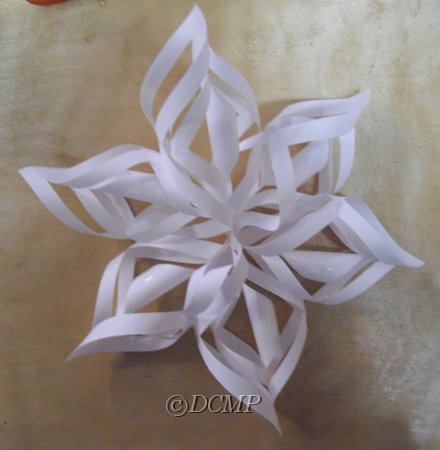
Step 16:
|
Gather both sections and staple, or tape, together. |